Saturday 31 March 2012

A FINAL FEW TILDA BITS TO SHARE

I just wanted to share a few pics of the last patch of Tilda doll creations I've made so far.  I've almost run out of fabric now so I'll have to go shopping soon but these are the last lot I've made up recently...

I started with a couple of little bunnies, large and small....


This is how they started out...


I stuffed him, and then added his ears and a pair of trousers...


The finished product, with tunic and little hat on the small one...  


I then went on to a lamb- how cute is this? ...


The whole collection so far...


Hope you liked them.  If I get around to making any more I will share with you.

Hubby is away on a golf trip with the boys this weekend so I'm off to settle down on the sofa with a glass of vino and a scary film, he can't do scary films (real wimp)!  Have a good one!

Wednesday 28 March 2012

CRICUT BIRDCAGE CARD

I'm just loving this new cartridge from Cricut.  This birdcage was just begging to be used but I wanted more depth.

I cut three of the birdcages and mounted them on top of one another using PinFlair glue so its only slightly raised on each layer.


I cut out the square and layered with the black cardstock.  I intended to have the birdcage just suspended in the square but the darn thing just keep swinging around and wound up with the back showing!!  I had to amend my plans and stuck some patterned paper behind and fixed the cage to it.  This sucker was going nowhere now.


Sentiment is PTI. Patterned cardstock is DCWV.


Working on another card now, will post when done!

Saturday 24 March 2012

FLUTTERBY BIRTHDAY WISHES

I've finally bought myself another Cricut cartridge after many months of only owning one, I now own two! 

I got to work on it straightaway and made up this card.  The cartridge is 'Straight from the Nest' which has some fab birdie things but some really cool and intricute images to use too.


I cut the central panel using the Cricut and mounted onto the black cardstock.  The butterfly stamp is a set of two from Cart-Us and they are really sweet.


As I've said before, I do find it difficult to just make a pure black and white card hence the small amount of red I've used.

And finally, I've gotta say a really big thank you for all the fabulous and really encouraging comments I've received recently.  Can't tell  you how much I appreciate them, and your visits.  We're all busy people and that you take the time see what I've been up to and to give me a bit of feedback is a real pleasure for me, so thank you so much!

Enjoy your weekend!

Wednesday 21 March 2012

CHILDS PLAY

EDIT:  I've had a few requests for the actual stamp sets I used from PTI for these cards.  There are two stamp sets and one die set which are:

TinyTreats: Birthday  this was the images and little sentiments alongside each one used.
Big Birthday Wishes I used the 'Looks Who's Turning...' sentiment from this set
By The Numbers die collection this is the die I used for the numbers.

Click on the links above to go directly to the relevant page on PTI's website.

xxx


I am still working on bits and bobs for the charity craft fair I am going to in April and really needed some birthday cards for the kiddies.

Using a set of dies and stamps from a collection by (you guessed it!) PTI, I came up with these little cards for every age from 1 through to 10.

I tried to use a different image on each one and in every possible colour combination, fairly neutral so that they could be used for either a girl or a boy in most cases.  These were a joy to do and really easy  because I did them in one big batch.


Friday 16 March 2012

BABY, IT'S NEW

EDIT:-

It's Back!  Sorry about that folks, no idea why the original template link dissappeared but its back now.  Enjoy!

Zoe


Craft Fair prep is in full swing and as I have already done the baby carriage a few times, I wanted to try something new.  I really wanted a baby's crib and searched online for templates but found nothing suitable.  I decided to have a go at making one up anyway and this is what I produced this afternoon.  This was cut using a lovely ivory shimmer card but sadly the simmer doesn't really show up in the pictures.


Once I had tried out a test sample and got my measurements right, I made a template and cut out all the pieces I would need.  I used the set of dies from PTI for the heart cut out and layer and also on the 'feet' of the crib.


Once all cut and scored it was quick to assemble.  I did trim up some cardboard coasters and glued them to the underside of the base to give it more rigidity.  It won't be carrying much weight but it helps to stop the side panels from bowing when items are put in it.


I made a little banner using a set of dies from PTI and stamped BABY on them, fixed to some ribbon and attached to the side of crib with tape.


On the other side I stamped and cut out the image of the stork and glittered his wings. 


To go inside I used the onesie die (PTI) and cut to pieces, trimmed the sleeves with some plain cardstock and fixed at the base with a 'flap'.  I filled a cello bag with a little baby onesie, tied with ribbon and fed it through the neck.  A dew drops of glue on the shoulder sections secured it all together.  I had seen a similar item to this on a blog site soem time ago (sorry I cannot remember who that was).


I also included a pair of itty socks, a dummy and a mini bath duck!


The Completed Package...

So sorry the picture doesn't really show the glimmer effect on the card - it looks lush in the flesh.  I just need to make up another one for a girl and I'm set to go.  When its done, I'll share.  There is a lot more I could have done with this really but I am happy for now with the look of it.  Once I have done the girls one I may well add a few more bits to this one - some fancy die cut edging around the top or something - anyway we'll see.

Enjoy your day and thanks so much for dropping in to check me out - I love your visits!


Wednesday 14 March 2012

ANOTHER TILDA DOLL CREATION

Been working on my second Tilda doll following my earlier post and again its from Tone Finnangers book, Tilda's Summer Ideas.  This little lady is called a Kitchengarden Angel.


Again I used a pink ink pad for the cheeks and a waterproof pen for the eyes.  The fringe is made using embroidery thread and the little buns are made using Tilda's range of hair made especially for these dolls.


Aren't these the cutest little flipflops!


On first sight of the pattern, the dungarees looked like they would be a real nightmare to make as they had to be lined with a different colour material  and all the pockets, waistband and bid but with patience, they were actually very easy.  This little piece of material hanging out of the pocket  is supposed to be duster/cloth.


The two girls together on the mantle of the fireplace. 


These have become quite an addiction for me.  It passes a few hours in front of the TV.  I just bought another of her books and am working on some Easter bits and bobs now, little lambs and bunnies (I can't stop buying material now, I thought I spent quite enough on ink, stamps and paper!)

Thanks so much for popping over to see me, it makes my day!

Have a good one.

Monday 12 March 2012

EGGS-TRA SPECIAL PACKAGE

Easter will soon be here and I have a craft fair Easter weekend so I needed to make up some bits to sell!
I made up these little bird houses which are filled with mini eggs using a favourite template of mine which is the  bird box template by Nicole Heady .


I only made a slight change to the design. The roof is all one piece normally and stuck onto the house so once its glued you have to rip it open to get to the contents.  These are such pretty things I wanted people to be able to keep them and reuse them.

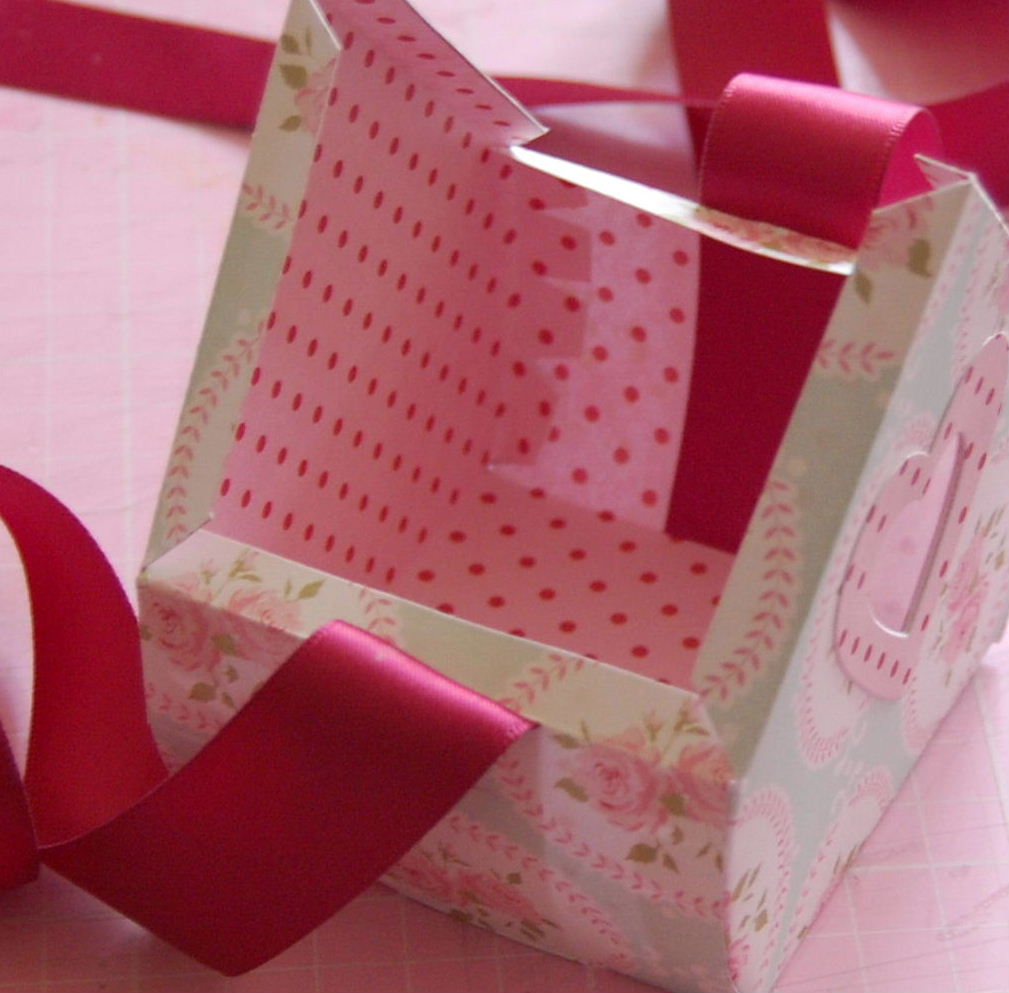
Once I had cut out and scored the design, I made little slits just wide enough for a ribbon to be pushed through at the base of each side panel and then again in the score line on each edge of the side panel.

(inside of box)

The ribbon is hidden inside the box and just pulled through the slits at the top to hold the roof in place once its attached.  I cut out the heart shaped window with the PTI heart dies and put some acetate inside to stop the contents coming out.


For the roof, I cut two strips of cardstock the same size (8cm x 9cm) and scored and folded one end at 1 cm and cut a slit the width of the ribbon at other end approx 1 cm from the edge.  I threaded the ribbon through the slit of one panel and fixed to the bird house with double sided tape but left the scored section unattached.  I threaded the ribbon through the other roof panel and lay the panel on top of the other one at the score fold, pulled the ribbon to the top and tied in a bow to hold it all in place and the contents secure.


This way when untied, one side opens right up so you can get your hands
on the goodies inside and reuse it when empty.


I made a couple more, one a little larger than the other two (I just enlarged on a photocopier).


I used a collection of doubled sided patterned papers called Flower Garden from Tilda (the same designs as the Tilda doll from my last post).  The solid cardstock in PTI.

Those little chocs scattered on the table for decoration purposes are sadly no more, I ate them all!  I am on a diet presently, two weeks in and although I've lost 6 1/2 lbs so far, I just can't resist a choc when presented to me!

Have a great evening all.

Saturday 10 March 2012

YOU LITTLE SEW & SEW

When I was visiting my mum a few weeks ago, I went shopping at the local Hobby Craft store (we don't have anything like this where I live so ALWAYS make the most of my visits here and spend a small fortune!).  Whilst looking for some felt I came across a pattern book by Tone Finnanger for her Tilda doll creations. 
I fell in love with the designs straightaway and bought a load of fabric so I could have a go. I was really really pleased with my first attempt so I wanted to share her with you.  She is a Flowergarden Angel.


This is how she started out, all arms and legs! 
My sewing machine has seen the light for the first time in years!


I used a Martha Stewart pale pink ink pad and sponge for her cheeks
and a waterproof pen for her eyes.


Fixing the arms to the body was the trickiest part I think but they didn't turn out too bad.


I was really surprised how quickly I made her.  Took me an afternoon and evening (about 6 hours) from start to finish.  She is 24" (60cm) high and I love her!  I may not have done it all exactly as an expert sewer would approve of but I'm happy.

I went a bit mad on the fabric buying so I will just have to make another one of her creations now to use it all up.  Will share with you soon.  This design is from the Tilda's Summer Ideas book if you're interested in having a go.

Take care.