Monday, 30 August 2010

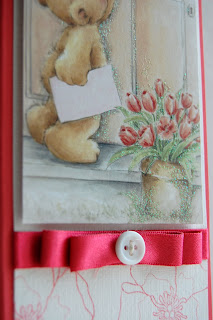
FLOWER GIRL


Isn't she adorable!  I love this little character.  I bought a whole bundle of these flowers so I am making very good use of them.


I am having so much fun with these.  The colouring is so theraputic. I can stamp the images and then spend an evening colouring them whilst watching the TV, copic in one hand and a Southern Comfort in the other!  Mind you the TV has been pretty dire recently - I've lost count the number of times Die Hard and Back to the Future has been shown over the last few months!  BORING!  Now... where's my Twilight DVD?!

Zoe x

Saturday, 28 August 2010

GETTING A HANDLE ON THINGS


More stationery today.  This time I made a little draw unit to hold some notelet cards and envelopes.  There are a lot of smaller ones about with four draws, two by two which are very cute but I wanted mine to a have a few more useful possilities out of it.  Each draw is just slightly larger than a standard A6 envelope.  I was about to make a third draw that I was going to section off so that you could store a small address book and some stamps in it, then I realised I didn't have enough cardstock in the same colour to complete it so had to go with just two draws in the end.


Now all I have to do is make up some notelet cards to go in it!

Sorry so short today, have a major headache but wanted to get something uploaded before I crash on the sofa.  Hope you're having a better day than me!

Zoe

Wednesday, 25 August 2010

A GREAT PURCHASE

Last month I won a few stamps from a blogger friend on eBay and have really been enjoying using them - once again, thank you Steph!  Once I started though I fell in love with these little images and had to go buy some more.

I am still practising my colouring skills with Copics, with some successes and some failures!  However, these were the ones I was most pleased with and used them to top some paper pads I made up for my craft fair this month.

Paper is from Dovecraft - Oriental selection, with border
punches from Martha Stewart and Anna Griffin.


Paper - DCWV, border punch - Anna Griffin.


Paper DCWV, sentiment and frame both PTI.


Paper and sentiment, both PTI

I used chipboard and covered with the designer paper.  I ran a coordinating coloured copic marker around the edges of the chipboard so that they were not left bare.  I cut a ton of A4 paper into 4 and each pad has about 150 sheets in them.  I bound them together with my Zutter Binder and added a bit of ribbon here and there.

I love making this type of thing.

Zoe


Saturday, 21 August 2010

ALL BOXED UP

A guy I work with asked me to make up a birthday card for his girlfriend who was turning 17.  I decided on a box card for this and based it on a similar design to one I made before.  I made four tags for this one though so that he could put his own greeting on one of them, a photo of them together on another, I put a little verse on the third and left one blank for her to fill in with memories of the day.


The card box all closed up.


One of the tags with a verse on it.


The little birthday cake tier, with candle no less!


He loved it, hope she did too!

The cardstock I used was from DCWV's The Luxury Stack which is beautiful quality, solid patterned card, all pearlized and metallic.  Unfortunately the pics do not really show this up too well.  The top of the box was created on my computer along with the banner in front of the tier cake inside the box, with a stamped image for the cake which I coloured with Copics. 

The candle is simply a tightly rolled piece of paper with a piece of yellow tissue paper inserted in the top to which I make a few strokes of orange with my Copic.  I make a small hole in the top tier of the cake and poked the candle through and fixed at the base with double sided tape so it didn't move around or fall out.

Thanks again for popping along to check on what I've been up to.  Hope you are enjoying your day!

Zoe x

Thursday, 19 August 2010

LITTLE BLESSINGS


Just bought this new stamp and it was crying out to be used IMMEDIATELY.  It's another Magnolia - I warn you there will be more of these coming so hope you won't get too bored!?


As the polka dot paper was too big a pattern for her dress, I just coloured it with Copics and used a white marker to make some dots.  I added a touch of glitter to her stockings which doesn't really show up too clearly in the pic.


The sentiment is PTI and I just added a strip of glitter to finish it all off.

Thanks so much for stopping by. 
Zoe x

Wednesday, 18 August 2010

CRAFT FAIR PRACTICE LAYOUT


I am doing another craft fair this weekend and I usually lay my 'stall' on the kitchen table to see how its gonna look when I get there.  I like doing these but its a lot of work and what I've laid out is not all the stuff I intend trying my hand at selling.  I've got a whole bunch of other stuff which hopefully will be used to fill up any gaps I'm left with if I sell well.  I've got another two fairs coming up in November and December so I'm going to be pretty busy for the next few months trying to come up with some new stuff!

I'll probably mess around with this some more but I am fairly happy with how it looks.


I am pushing the card side of things a bit more this time than I normally do so hopefully I'll have made a good decision on that score!  Time will tell.

Thanks for looking, as always.
Zoe x

Monday, 16 August 2010

SORRY BUT ITS MORE NOTEPADS!

As you should know by now I like a list - here are a few that I made today and I just wanted to share them with you.


This was just a few stamps and a butterfly die with some gems, simple but effective.


For this one I used a section of a die cut I got with a bunch of stuff I ordered from QVC which were meant to make up some piramarge cards but I never used them so I popped one of the pop out sections from the bear design onto the front of this pad. It's already glittered and therefore did not require much from me to finish this one off!

Short and sweet today.  Have good one.

Zoe

Tuesday, 10 August 2010

YOU CAN NEVER HAVE TOO MANY.... HANDBAGS

Having made a start on my previous box/come flower holder, I got on to making some handbags to make pretty wrappings for little gifts. 


This was super simple to make so made a few!


All the DP is from American crafts with the solid cardstock from PTI or American Crafts also.  I used the Top Note die to make the fake fastener and a large fabric covered brad for this one with ribbon tied from back to front and around the brad to hold the top together.

The two below have slightly different fasteners.  I used a strip of cardstock, fixed at the back with double sided tape and then some stick and stick velcro tabs to the underside of the front and stuck a button on top.  I used a white pen to make the fake stitching.  They are pretty sturdy and will hold quite a lot.  I filled one with  bottles of bath salts, foam, face wash and clenser and it still held its shape when I picked up the bag by the handles.


I can put together some simple instructions  and will post if anyone is interested.

Be crafty!
Zoe


Saturday, 7 August 2010

IN BLOOM

I've been in the mood for bag and box creations recently and started with this little box bag to display some blooms in.


I used textured cardstock and stamped a design around the base.  I attached ribbon to all the sides which added some more colour and made the box bag a bit more sturdy once completed.  I attached a handle using matching cardstock with ribbon around it and held it in place with some brads.  I filled the box with a small square of florist foam in a plastic bag so it didn't wet the box and filled up with some flowers.  For the front I threaded a buckle with some matching ribbon and attached with double sided tape.

It certainly makes a change from a vase.  I am working on some handbags now and will post shortly.

Bye for now.
Zoe

Thursday, 5 August 2010

BLOOMERS

I recently came across these gorgeous things, having seen some being used on other blogs and have hunted high and low to find them.  Finally I managed to get my hands on them and got to work straightaway.


In case these are new to you too, they come on a strip of mesh and are made up of organza ribbon stitched to the mesh in rose shapes.  They trim up really easily and adhere well with double sided tape.  I nearly resorted to making my own but thankfully I didn't have to.  I'm pretty good with a sewing machine but I am certain they would not have come out nearly as pretty as these.

They are very soft and pliable so will easily fit inside an envelope but I didn't want to risk them being crushed too much so I made boxes for these to go in.  I got brown, green, pink and red.  They also do a really lovely blue but they didn't have that in stock when I bought them.


These are all going along to my craft fair hence them all being the same design.  So often someone likes the card but maybe not the colour so I'm playing safe here!

Have a good day.
Zoe

Wednesday, 4 August 2010

DUDE, YOU ROCK!


Another little cutie Magnolia card today. I’ve used the easel card as the base once again and made a box to accompany him, stamped using PTI’s polka dot basics.


I've added stickles glitter to the edge of the flowers and used a PTI sentiment for the bcase of the card.


Gotta dash, bidding on something on ebay - I love the final minutes... so exciting!

Take care
Zoe x

Monday, 2 August 2010

EMERGENCY - I NEED.....

CHOCOLATE and I need it NOW!

I have a chocolate craving every single day.  I can't help myself and it certainly doesn't help my weight either!  I am pretty sure there are others of the same mindset as myself and what better than some coco to perk yourself up, if only for a short time.  Hence the....


I found a site that showed a box like this but for smaller sized choc bars that they'd bought in the shop in the US and I thought what a fab idea so I set about making my own only with the giant size bars we can buy here - why bother if its only gonna be a few chunks, give me loads of the stuff!

I bought the chocolate and measured it to make my box.  My measurements are below - hope you can see them OK.


I made up the box and inserted my chocolate bar and then I made the label for the front using my computer and printed onto cardstock, trimmed it and adhered to the front of the box.


The wording I used is as shown below, I just changed the ingredients section to my own wording, the rest is from the original that I copied.


I made up a whole bunch of these and did different colours to mix things up a bit.


I better get going and find homes for these before I consume the contents myself!  Take care all.

Zoe x